Videos

Coding an Obsidian plugin with AI: lean back & lean forward
This is a video presentation intended for experienced developers. I go over the mindset and techniques for integrating AI into your development process. In this example, I'm creating an obsidian plug-in.
0:02 – Who This Is For & Why This Isn’t a How-To
0:40 – Lean Back vs Lean Forward: The New AI Developer Workflow
1:23 – Solo Dev Power: Building Personal Tools Fast with AI
2:14 – Why Coding Is Now Cheap and Judgment Is Valuable
3:08 – Architecture, Simplicity, and Giving Instructions to Bots
4:37 – Stop Doing the Work Yourself: Using ChatGPT + Cursor Correctly
5:02 – Lean Back / Lean Forward as a Continuous Loop
6:00 – Tool Stack Overview: ChatGPT, Obsidian, Cursor
7:55 – Cost Reality and Why These Tools Are Worth It
9:13 – Voice Mode, Walking, and Turning Thoughts into Instructions
10:07 – CLI Agents and Pointing Multiple Tools at the Same Files
11:02 – Creative Activity Ledger: What the Plugin Actually Does
12:14 – Why Plain JavaScript, No Builds, and Text Files Win
13:36 – Obsidian Plugin Development Setup and Dev Tools
15:19 – Project Structure: main.js, manifest.json, README
16:54 – Git Strategy for Solo Devs and Plugin Publishing
18:03 – Using Registries and Text Files Instead of Hard-Coding
20:28 – Dashboards, Commands, and Hotkeys in Obsidian
23:37 – AI-Driven Development Cycles in Practice
25:01 – Why Screenshots Are Critical in an AI Workflow
27:00 – Managing Instructions, Files, and Execution Flow
30:28 – Rapid Iteration: Small Changes vs Structural Refactors
34:10 – The New Role of Senior Developers in an AI World
36:16 – Final Thoughts and Where to Find More Work

Guitar in Fourth Gear Perfect Fourths Tuning Part 10 Triads Practice for Tone, Clarity & Intonation
In this video, I continue the Perfect Fourths Tuning series with Part 10: Triads and Practice for Tone, Clarity, Intonation, and Variety.
Rather than focusing on speed or metronome drills, this session explores a slower, more deliberate approach to practice—one that emphasizes sound quality, physical awareness, and musical exploration. Using triads in perfect fourths tuning, I walk through how practicing slowly can dramatically improve tone, clarity between notes, intonation, and expressive variety across the fretboard.
This kind of practice is especially valuable for adult guitarists, players returning to the instrument, or anyone looking to reconnect with guitar as a creative and meditative activity—not just a technical one.
You’ll learn how small adjustments in finger pressure, hand position, picking approach, amp tone, and fretboard position can completely change how a note or chord sounds. Over time, this approach leads to better control, cleaner playing, and greater confidence—especially when improvising or playing in unfamiliar areas of the neck.
📄 PDFs and triad worksheets are linked in the description
📚 I also reference my books on perfect fourths tuning and triads, which I’ll be covering in more detail in upcoming videos
⸻
TABLE OF CONTENTS
0:01 – Introduction: Perfect Fourths Tuning Part 10
0:06 – Triads as a Practice Tool
0:10 – Practice Goals: Tone, Clarity, Intonation, and Variety
0:17 – What Perfect Fourths Tuning Is
0:34 – Tuning the Guitar Down vs Up
1:05 – PDFs and Triad Resources
1:11 – Why Practice as an Adult Guitarist
1:25 – Practice as Meditation and Relaxation
1:40 – Mental Focus and Shutting Off Mental Chatter
2:02 – Practice Beyond Metronome Drills
2:14 – Practicing at a Different Pace
2:58 – Small Daily Practice Sessions Add Up
3:30 – Why This Practice Is About Sound, Not Speed
3:45 – Playing Extremely Slowly for Better Tone
4:02 – Finger Placement and Sustain
4:17 – Learning from Single Notes
4:35 – Giving Yourself Permission to Practice This Way
5:16 – First-Principles Practice and Honest Self-Assessment
5:29 – Adapting Technique After Injury
5:55 – Why Good Tone Comes Before Speed
6:11 – Long-Term Improvement Mindset
6:49 – Slow, Deliberate Triad Practice
7:46 – The Four Core Focus Areas Explained
8:00 – Body Position, Guitar Angle, and Comfort
8:49 – Right-Hand Techniques and Picking Variety
9:08 – Separating Practice from Performance
9:42 – Exploring Sustain and Resonance
9:46 – Defining the Four Core Goals
10:40 – Tone: Single Notes and Noise Control
11:15 – Same Note, Different Positions, Different Sound
12:18 – Amp Tone, Pickups, and Gain Structure
13:23 – Right-Hand Attack, Muting, and Dynamics
14:04 – Clarity: Making All Notes Ring Cleanly
14:54 – Fixing Problem Chords and Weak Positions
15:52 – How Amp Tone Changes Clarity Requirements
16:28 – Note Choice and Voicing Variety
17:36 – Consistent Shapes Across the Neck
17:55 – Intonation: Playing in Tune with Yourself
18:12 – Hearing and Fixing Beating Between Notes
18:39 – Light Touch and Finger Pressure
19:24 – Why Slow Practice Improves Intonation
20:02 – Posture, Setup, and Instrument Factors
21:24 – Adjusting for Different Neck Positions
21:45 – Practicing Triads Up the Neck
22:40 – Tempo, Tone, and Variation Experiments
23:30 – Breaking Out of Familiar Fretboard Zones
24:19 – How Position Changes Sound and Feel
24:35 – Creating Variety Within Triads
25:23 – Exploratory vs Performance Practice
25:35 – Upcoming Videos and Book Overview
26:07 – Closing Thoughts
Guitar in Fourth Gear Perfect Fourths Tuning Part 14 major triads first position
In this lesson on perfect fourths tuning, I break down major triads in first inversion, starting on the third instead of the root, across the entire fretboard using four repeatable shapes. Perfect fourths tuning reveals consistent interval patterns and octave pathways, eliminating CAGED-style breaks. This method helps experienced guitarists develop true fretboard awareness, hear chord tones clearly, and navigate harmony with confidence in real musical contexts.
TABLE OF CONTENTS:
00:00 – Introduction: Perfect Fourths Tuning, Part 14
00:10 – Series Goal: From CAGED Boxes to Interval Thinking
00:49 – What Is Perfect Fourths Tuning (E–A–D–G–C–F)
01:26 – Lesson Objective: Major Triads in First Inversion
01:54 – Overview of the Four First-Inversion Triad Shapes
02:46 – Interval Structure: Minor Third + Perfect Fourth
03:10 – Shape 1: 3–5–1 on Adjacent Strings
04:08 – The Four Triad Types (Major, Minor, Diminished, Augmented)
04:32 – Using Octaves to Extend Triads Across the Neck
05:19 – Comparing Root Position vs First Inversion Mapping
06:22 – Shape 1 Across Multiple Octaves
07:57 – Shape 2: Third on One String, Fifth + Root on the Next
09:14 – Thinking in Intervals Instead of Fret Numbers
10:24 – Shape 3: Third + Fifth on One String, Root on the Next
11:17 – Fast, Repeatable Shapes in Perfect Fourths
12:09 – Shape 4: All Notes on a Single String
13:43 – Repeating the Four Shapes Across All Six Strings
14:50 – How Four Shapes Cover the Entire Fretboard
15:08 – Practice Strategy: Slow, Focused, Ear-Driven
15:34 – How This Improves Real-World Improvisation
15:45 – Books, PDFs, and Continuing the Series
Guitar in Fourth Gear Perfect Fourths Tuning Part 18 minor triads Second Position
In this lesson on perfect fourths tuning, I cover minor triads across the fretboard starting from the second inversion using four repeatable shapes. Perfect fourths tuning removes CAGED-style pattern breaks and turns the fretboard into a consistent grid, making it easier to see, hear, and connect chord tones across multiple octaves. This video focuses on building real interval awareness and fretboard fluency so minor triads become flexible musical tools instead of memorized box shapes.
TABLE OF CONTENTS:
00:01 – Introduction: Perfect Fourths Tuning Part 18
00:12 – Series Goal: Escaping CAGED and Learning from First Principles
01:10 – What Is Perfect Fourths Tuning (E–A–D–G–C–F)
01:53 – Lesson Objective: Minor Triads in Second Inversion
02:20 – Overview of the Four Second-Inversion Triad Shapes
03:17 – Shape Breakdown: 5–1–♭3 Fingerings
04:06 – Position Context: Second Inversion in the Full System
04:37 – Mapping Minor Triads Across 24 Frets
05:12 – Establishing the Tonal Center (A Minor)
05:58 – Shape 1: 5–1–♭3 on Adjacent Strings
06:52 – Using Octaves to Move Horizontally and Vertically
07:48 – Shape 1 Across Multiple Neck Positions
07:51 – Shape 2: 5–♭3 String Pair Variations
08:28 – Efficient Fingering and Interval Awareness
09:43 – Shape 2 Across Five Strings
10:36 – Shape 3: Wide-Interval Second-Inversion Shapes
11:37 – Understanding Fourths and Thirds Inside Minor Triads
12:19 – Shape 3 Across the Neck Using Octaves
14:05 – Shape 4: All Notes on One String
14:56 – One-String Shapes and Octave Replication
16:28 – Playing Second-Inversion Minor Triads on All Six Strings
18:39 – Connecting Inversions into a Complete Fretboard Map
19:48 – Practice Advice: Hearing Chord Tones with Drones
21:14 – Books, PDFs, and Continuing the Series

Guitar in Fourth Gear Perfect Fourths Tuning Part 9; Triads why study triads
In this video, I explain why triads are the foundation of harmony and why studying them becomes dramatically simpler in perfect fourths tuning. I break down how triads connect across the fretboard, how inversions work, and why fourths-based symmetry reduces memorization while improving musical awareness. This video sets the groundwork for a longer series focused on triads as first principles rather than disconnected shapes.
⸻
TABLE OF CONTENTS
0:01 – Introduction: Perfect Fourths Tuning & Triads
Why this channel focuses on fourths tuning and why triads matter.
0:12 – What Is Perfect Fourths Tuning?
Review of standard tuning vs. fourths tuning (E–A–D–G–C–F) and tuning strategies.
1:01 – Why Study Triads at All?
Triads as the foundation of Western harmony and musical hearing.
1:17 – Hearing Triads Musically
Major, minor, diminished, and augmented triads as recognizable sounds inside music.
2:05 – Triads vs. Box Patterns
Why chord-tone thinking leads to more musical improvisation than scale boxes.
2:55 – Triads as a Gateway to Advanced Harmony
Using triads as a stable foundation before extending into more complex harmony.
4:10 – Why Perfect Fourths Simplifies Triads
How symmetry reduces the total number of shapes you need to learn.
4:29 – The Math of Triads in Fourths Tuning
Four versions × three inversions × four triad qualities = 48 total shapes.
5:04 – Demonstrating Triad Versions
Different string groupings and layouts for the same triad.
5:12 – Understanding Inversions in Practice
Root position, first inversion, and second inversion explained on the fretboard.
6:46 – Why CAGED Becomes Overwhelming
How the G–B major-third break explodes the number of required shapes.
7:42 – Shape Explosion in Standard Tuning
Why triads balloon to hundreds of shapes in CAGED-based systems.
8:21 – One Shape Across the Neck (Fourth Tuning Example)
Demonstration of a single triad shape moving diatonically.
9:00 – Comparing CAGED vs. Fourths Side by Side
Multiple shapes vs. one repeated geometry.
9:53 – Series Roadmap
Overview of upcoming videos covering every triad and inversion in detail.
10:10 – Teaching from First Principles
Why this series breaks concepts down more slowly and deliberately.
10:34 – Closing & What’s Next
Books, upcoming lessons, and continuing the triad-focused journey.
Guitar in Fourth Gear Perfect Fourths Tuning: Part 16 minor triads starting on the root
In this lesson on perfect fourths tuning, I break down minor triads across the fretboard, starting from the root, using four repeatable shapes. Perfect fourths tuning creates symmetrical interval patterns that eliminate CAGED-style box confusion and make triads easy to see, hear, and connect across octaves. This method builds real fretboard fluency by training your ear to recognize chord tones and navigate harmony using intervals instead of memorized shapes.
TABLE OF CONTENTS:
00:00 – Introduction: Perfect Fourths Tuning, Part 16
00:09 – Series Goal: Replacing CAGED with Interval Thinking
01:01 – What Is Perfect Fourths Tuning (All Fourths Across the Neck)
01:41 – Lesson Objective: Minor Triads Starting on the Root
01:56 – Overview: The Four Minor Triad Shapes
02:30 – Why Four Shapes Cover the Entire Fretboard
03:00 – Interval Structure of the Minor Triad (♭3 + 3)
03:39 – Major, Minor, Diminished, and Augmented Compared
04:26 – Mapping the Minor Triad Across 24 Frets
05:05 – Shape 1: 1–♭3–5 on Adjacent Strings
06:03 – Using Octaves to Extend Shapes Horizontally
07:22 – Shape 2: Root on One String, ♭3 + 5 on the Next
08:33 – Repeating the Same Shape Across All Strings
09:00 – Shape 3: Root + ♭3 on One String, 5 on the Next
10:15 – Diagonal and Octave-Based Navigation
10:17 – Shape 4: All Notes on a Single String
11:29 – Playing Minor Triads on All Six Strings
12:05 – Why Symmetry Simplifies Fretboard Learning
12:55 – Practice Strategy: Intervals Over Boxes
13:53 – Books, PDFs, and Continuing the Series

Guitar in Fourth Gear Perfect Fourths Tuning: Part 4 Major Scale Whole Whole Pattern
In this lesson, I show how to play a two-and-a-half octave major scale using a single whole-tone (whole–whole) pattern on a guitar tuned in perfect fourths.
The focus is on using one repeating shape across all six strings, understanding how it connects through slide points, and practicing it slowly to build clean tone, muscle memory, and fretboard orientation. Rather than thinking in terms of modes, this video treats the pattern as a practical finger exercise for navigating the neck and recognizing roots anywhere you land.
This approach is especially useful if you’re rebuilding your fretboard knowledge from first principles or transitioning from standard tuning. A PDF worksheet is linked below, and this video sets up the next lessons covering the whole–half and half–whole patterns.
⸻
CHAPTERS
0:01 – Introduction: Major Scale with the Whole-Tone Pattern
0:13 – Using One Shape Across All Six Strings
0:22 – Perfect Fourths Tuning Setup (E A D G C F)
0:59 – PDF Worksheet and Practice Context
1:09 – Major Scale Overview in Perfect Fourths
1:29 – Interval Color Coding and Scale Degrees
2:02 – Focusing on the Whole–Whole Pattern Only
2:27 – One Idea per Video: Patterns as Finger Exercises
2:51 – Finding and Hearing the Root Anywhere
3:25 – Why Perfect Fourths Makes Shapes Repeat
3:50 – Full Major Scale Diagram Orientation
4:26 – Reading the Diagram vs Standard Fretboard Views
4:39 – Sliding Through the Pattern to Cover Octaves
5:22 – Using the B Note as a Transition Point
5:43 – Slow Practice for Clean Tone and Accuracy
6:41 – Diagonal Movement and Repeating the Same Shape
7:21 – Preparing for Whole–Half and Half–Whole Patterns
7:50 – Thinking in Three String Pairs
8:25 – Relaxed Practice and Building Long-Term Bearings
9:07 – Book Reference and Wrap-Up

Guitar in Fourth Gear Perfect Fourths Tuning: Part 7 Major Scale horizontal 3NPS
In this lesson, I demonstrate how to play the major scale across the entire fretboard using three-notes-per-string patterns in perfect fourths tuning.
By tuning in perfect fourths, scale shapes repeat cleanly across all strings without the pattern breaks found in standard tuning. We move horizontally across the neck and vertically through all seven modes—Ionian, Dorian, Phrygian, Lydian, Mixolydian, Aeolian, and Locrian—using just three repeating finger patterns.
This approach is designed to build long-term fretboard fluency through slow, consistent practice rather than memorization of isolated positions.
---
TABLE OF CONTENTS
0:01 – Introduction and Goals
Overview of Part 7: horizontal major scale and vertical modes in perfect fourths tuning.
0:15 – Horizontal vs. Diagonal Three-Notes-Per-String
How this approach differs from diagonal shifting patterns.
0:33 – Why Perfect Fourths Simplifies Patterns
Continuous shapes, no B-string break, and repeating structures.
0:50 – Perfect Fourths “Top-Up” Tuning Setup
Tuning at the fifth fret and raising the B and high E strings.
1:45 – Major Scale Interval Review
Whole steps and half steps that define the major scale.
2:27 – Three Core Finger Patterns
Whole–whole, half–whole, and whole–half groupings.
3:02 – Why Patterns Stay Consistent Across Strings
How fourths tuning preserves fingering shapes when shifting strings.
4:23 – Overview of the Demonstration Flow
Moving horizontally across the neck through all modes.
5:02 – Ionian Mode (Major Scale)
Starting on C, three-notes-per-string fingering, and visual color coding.
6:38 – Practice Philosophy
Learning shapes slowly to build speed through understanding.
7:48 – Pattern Repetition Across Modes
Seeing the same three finger patterns repeat up the neck.
8:28 – Dorian Mode
How the pattern wraps and shifts when starting on D.
10:26 – Understanding the 1–4–5 Relationship
Why certain whole-step patterns cluster on the fretboard.
14:04 – Smooth Dorian Playthrough
Hearing and feeling the Dorian pattern cleanly.
14:07 – Phrygian Mode
Starting higher on the neck and maintaining the same shapes.
16:53 – Lydian Mode
Raised fourth sound and visible tritone relationships.
19:16 – Lydian Playthrough
Clean demonstration and discussion of tonal color.
19:41 – Mixolydian Mode
Starting on G and reinforcing pattern familiarity.
21:19 – Long-Term Practice Mindset
Consistency over weeks and months to internalize patterns.
22:22 – Aeolian Mode (Natural Minor)
Repeating shapes as the modes cycle upward.
24:14 – Locrian Mode
Adjusting position due to fretboard limits.
24:55 – Completing the Full Major Scale
Covering the entire scale using only three patterns.
25:09 – Key Takeaway
Simple patterns, deep results through repetition.
25:25 – Books, Resources, and Closing
How this material fits into the perfect fourths book series and future topics.
Guitar in Fourth Gear Perfect Fourths Tuning: Part 8 Change Major Scale one note at a time: modes
In this video, I explain how perfect fourths tuning makes it easier to see how the major scale transforms one note at a time as you move through the modes around the cycle of fifths (or fourths). Using a single-string and fretboard-based approach, I show how each mode differs by only one note, how tritones mark points of change, and why this symmetry helps you alter musical color and emotion without moving your hand. The goal is not memorizing modes, but understanding their relationships visually and aurally on the guitar.
---
TABLE OF CONTENTS
0:01 – Introduction: Modes, Major Scale, and Fourths Tuning
Overview of how perfect fourths tuning reveals modal relationships.
0:17 – Cycle of Fourths vs. Cycle of Fifths
How downward fourths equal upward fifths and why that matters musically.
0:32 – Perfect Fourths Tuning Setup
Explanation of “top-up” fourths tuning and reference PDFs.
1:06 – Three Core Scale Patterns
Using three morphing patterns to track scale changes.
1:51 – Choosing F Major as the Reference Key
2:08 – Navigating the Circle of Fifths
How keys move: F → C → G → D → A → E, and where B♭ fits in.
3:52 – Starting with B♭ Lydian
Why Lydian acts as a “pre-major” starting point.
4:22 – Lydian vs. Major
How raising the fourth creates the Lydian sound.
5:05 – F Major (Ionian)
Returning to the major scale and resetting the reference.
5:22 – C Mixolydian
Single-note change: major 7th becomes flat 7th.
5:41 – G Dorian
Shift to a minor third while retaining the major 6th.
6:08 – D Aeolian (Natural Minor)
Another single-note change and its emotional effect.
6:29 – A Phrygian
Lowering the second degree and identifying the tritone shift.
6:53 – E Locrian
Flat second and flat fifth, introducing diminished tension.
7:01 – Why Locrian Breaks the Diatonic Cycle
How the tritone pushes you out of the original key.
7:25 – Visualizing the Full Fretboard Diagram
Comparing abstract diagrams with fingerboard-aligned views.
7:46 – Tritones as Change Markers
How tritone locations show where modes transform.
8:25 – Removing Tritones = Major Pentatonic
Seeing how pentatonics emerge by omission.
8:41 – One-String Major Scale Pattern
Whole-step relationships on a single string.
9:20 – Major vs. Mixolydian Side by Side
Hearing and seeing the single-note difference.
10:36 – Dorian Changes Explained
Where the minor third replaces the major third.
11:50 – Aeolian Changes Explained
Dropping the major 6th to reach natural minor.
14:25 – Phrygian Changes Explained
Lowering the second degree and its sound.
15:45 – Locrian Changes Explained
Flat second and flat fifth creating instability.
17:00 – One-Note Changes Between Modes
The core takeaway: modes differ by one note at a time.
17:14 – Applying Modes Over the Same Root
Changing emotional color without moving hand position.
18:22 – Modal Comparison on E
Quick demonstration of multiple modes over a single root.
20:00 – Why B Is Excluded in F Major
Understanding the tritone relationship to F.
21:21 – Revisiting the Modal Sequence
Full walk-through: B♭ Lydian → F Major → C Mixolydian → G Dorian → D Aeolian → A Phrygian → E Locrian.
23:17 – Extended-Neck Perspective
How patterns become clearer on 7- or 8-string guitars.
23:58 – Tools and Diagrams
Notes software, neck diagram tools, and study resources.
24:07 – Books and Series Context
How this material fits into the Guitar in Fourths series and upcoming books.
24:41 – Closing Thoughts
Studying modes as relationships rather than shapes.

Guitar in Fourth Gear Perfect Fourths Tuning: Part 11 HACK: 3 concepts to master 48 triad fingerings
Perfect Fourths Tuning Part 11 – Learn 48 Triad Shapes with 3 Simple Levers
In Perfect Fourths Tuning Part 11, I show how to unlock 48 triad fingerings in the same octave by mastering just three core concepts. Using all-fourths tuning, complex CAGED shapes collapse into a small set of repeatable, symmetrical triad patterns that work anywhere on the fretboard.
This lesson introduces the four triad qualities, three inversions, and four fretboard layouts that form the foundation of the Guitar in Fourth Gear system. Instead of memorizing boxes, you learn how triads connect horizontally and vertically, giving you real improvisational freedom and a clearer understanding of the guitar neck.
CHAPTERS
00:01 – Perfect Fourths Tuning Part 11 Overview
00:18 – Guitar in Fourth Gear Philosophy (Beyond CAGED)
01:02 – What Is Perfect Fourths (All Fourths) Tuning
01:35 – The 48 Triad Shapes Explained (4 × 3 × 4)
02:06 – One Triad, One Octave, Multiple Fingerings
02:27 – Four Core Triad Fretboard Patterns
03:30 – Triad Inversions: Root, First, Second
03:51 – The Four Triad Types: Aug, Maj, Min, Dim
04:28 – Why Small Interval Changes Create 48 Shapes
05:09 – Perfect Fourths vs CAGED (Why This Is Easier)
05:42 – Playing Major, Minor, Diminished, Augmented Triads
06:22 – Understanding Triad Inversions Musically
07:06 – Horizontal vs Vertical Triad Movement
07:54 – Relating Fourths Tuning to CAGED Shapes
08:49 – The Four Triad Shapes Clearly Shown
09:26 – How Triad Shapes Connect Across Inversions
10:04 – Root Position Triad Practice
10:18 – First Inversion Triad Practice
11:34 – Second Inversion Triad Practice
12:14 – Seeing the Complete System
12:36 – How to Practice Triads in Fourths Tuning
13:05 – Why All Fourths Tuning Makes Shapes Universal
13:16 – Books, PDFs, and Continuing the Series

Guitar in Fourth Gear Perfect Fourths Tuning: Part 12 1-4-5 Chords with Inversions & Voice Leading
Perfect Fourths Tuning Part 12 – 1-4-5 Chords with Inversions & Voice Leading
In Perfect Fourths Tuning Part 12, I show how to play 1-4-5 chord progressions using triad inversions in the same octave for smooth, musical voice leading. Using all-fourths tuning, familiar progressions stop sounding static and start moving logically across the fretboard—without jumping into new shapes.
This lesson builds on triad inversions and applies them to the most common progression in music. By rotating root position, first inversion, and second inversion of major triads, you’ll learn how to connect chords with minimal motion, improve harmonic awareness, and escape parallel-fifth “block chord” playing associated with CAGED.
CHAPTERS
00:00 – Perfect Fourths Tuning Part 12 Overview
00:05 – Lesson Goal: 1-4-5 Chords with Inversions
00:15 – Guitar in Fourth Gear Philosophy (Beyond CAGED)
01:11 – What Is Perfect Fourths (All Fourths) Tuning
01:44 – Using Triad Inversions for Voice Leading
02:03 – Why Inversions Matter (Bob Weir / Rhythm Guitar)
02:23 – Review: Root, First, and Second Inversions
02:54 – Inversions Connected Up the Neck
03:10 – The 1-4-5 Progression Explained
03:31 – Scale Degrees Inside 1-4-5 Chords
03:55 – Root Position 1-4-5 (Baseline Sound)
04:02 – How Inversions Improve Voice Leading
04:13 – 1-4-5 with Inversions: First Position Example
04:52 – Moving the Progression Up the Neck
05:13 – Second Inversion Starting Point
05:38 – Diagram Walkthrough: Same Shapes, New Function
06:28 – Relating Inversions to Familiar CAGED Shapes
06:58 – Playing 1-4-5 on Different String Sets
07:55 – Same Shapes, New Key (Symmetry in Fourths)
08:03 – First Inversion 1-4-5 Example
08:50 – Hearing the Voice Leading Clearly
09:31 – Why CAGED Breaks and Fourths Don’t
09:46 – Second Inversion 1-4-5 Example
10:21 – Complete 1-4-5 Cycle Across Inversions
11:03 – Seeing How All Inversions Interlock
12:12 – Sliding the Same Shapes Horizontally
13:06 – Avoiding Parallel Fifths with Inversions
13:53 – Practicing 1-4-5 with Minimal Movement
14:25 – How This Builds Long-Term Harmonic Control
15:01 – Practice Advice: Slow, Thoughtful Repetition
15:29 – Books, PDFs, and Further Study
16:08 – Closing Thoughts

Guitar in Fourth Gear Perfect Fourths Tuning: Part 13 major triads starting on the root
In this lesson on perfect fourths tuning, I show how to play major triads across the entire fretboard starting from root position using four repeatable patterns. By abandoning CAGED box thinking and focusing on interval relationships, perfect fourths tuning reveals consistent octave shapes and triad pathways that connect smoothly across strings and positions. This approach helps experienced guitarists rebuild fretboard understanding from first principles and develop long-term fluency with triads, arpeggios, and harmony.
TABLE OF CONTENTS:
00:00 – Introduction: Perfect Fourths Tuning, Part 13
00:40 – Why Perfect Fourths Simplifies Guitar Learning
01:10 – What Is Perfect Fourths Tuning (No B-string Breaks)
01:54 – Lesson Goal: Major Triads Across the Neck (Root Position)
02:16 – Overview of the Four Major Triad Patterns
03:00 – Major Triad Structure: Major Third + Minor Third
03:35 – Pattern 1: 1–3–5 on Adjacent Strings
04:50 – Pattern 2: Root on One String, 3–5 on the Next
07:00 – Octave Relationships in Perfect Fourths Tuning
07:45 – Comparing Octaves in CAGED vs Perfect Fourths
09:20 – Mapping Major Triads Across Multiple Octaves
10:30 – Pattern 3: Root and Third on One String, Fifth on the Next
12:35 – Pattern 4: All Notes on a Single String
15:10 – Seeing All Patterns Hidden Inside Each Other
17:30 – How These Shapes Connect Across the Entire Neck
18:00 – Practice Philosophy: Slow, Methodical, Interval-Based Learning
18:40 – How This Prepares You for Advanced Guitar Concepts
18:55 – Books, PDFs, and Next Lessons

Guitar in Fourth Gear Perfect Fourths Tuning: Part 13: Four Patterns for Root Position Major Triads
Perfect Fourths Tuning Part 13 – Major Triads Across the Fretboard (Root Position)
In Perfect Fourths Tuning Part 13, I show how to play major triads across the entire fretboard starting from the root position, using four repeatable fretboard patterns in all-fourths tuning. Instead of memorizing large CAGED shapes, this lesson focuses on interval structure, octaves, and symmetry to help you connect major triads vertically and horizontally across multiple octaves.
This is a slow, first-principles approach to triads—designed for experienced guitarists who want to replace memorized box shapes with true intervallic understanding. By learning how major triads repeat through octaves in perfect fourths tuning, you build a mental map of the neck that makes advanced harmony easier to recognize and play later.
CHAPTERS
00:01 – Perfect Fourths Tuning Part 13 Overview
00:08 – Lesson Goal: Major Triads Across the Fretboard
00:12 – Guitar in Fourth Gear Philosophy (Intervals Over CAGED)
01:10 – What Is Perfect Fourths (All Fourths) Tuning
01:54 – What You’ll Learn: Root Position Major Triads
02:16 – The Four Major Triad Fretboard Patterns
02:22 – Pattern 1: 1-3-5 on Adjacent Strings
02:35 – Pattern 2: Root on One String, 3-5 on the Next
02:42 – Pattern 3: Root-3 on One String, 5 on the Next
02:49 – Pattern 4: Major Triad on One String
03:00 – Interval Structure of the Major Triad (M3 + m3)
03:26 – Major Triad Shapes Shown with Diagrams
03:40 – Root Position Major Triad Example
03:51 – Playing the Same Notes on Different String Sets
04:01 – Seeing Major Thirds and Minor Thirds on the Neck
04:26 – Major vs Minor Triads (Quick Comparison)
04:45 – Review: Four Triad Qualities in Context
05:15 – How Major Triads Move Across Octaves
05:27 – Octave Rule: Down Two Strings, Up Two Frets
05:45 – Second Octave Relationship Explained
06:20 – Why Octaves Are Easier in Fourths Tuning
06:58 – Comparing Octaves to CAGED G-Shape Thinking
07:12 – Full Fretboard View: Major Triads Across 24 Frets
07:31 – Why This Looks Overwhelming (and Why It Isn’t)
07:39 – Root Position vs Inversions (Preview)
08:04 – Connecting Root Positions Up One String
08:21 – Pattern 1 Across Multiple Octaves
09:01 – Shifting Octaves Near the 17th Fret
09:46 – Seeing Root Notes Across All String Sets
10:28 – Pattern 2 Across the Neck
10:57 – Hearing the Triad Connection Between Octaves
11:23 – Pattern 3: Major Third on One String
12:24 – Repeating the Same Shape Vertically
13:07 – Combining Adjacent Octave Positions
14:24 – Pattern 4: Major Triads on a Single String
14:50 – Playing One-String Triads Across All Strings
16:27 – How All Other Shapes Are Hidden Inside This
17:36 – How This Fits into the Full Triad System
18:00 – Practice Advice: Slow, Intentional Learning
18:40 – Why This Makes Advanced Playing Easier Later
18:42 – Books, Resources, and Continuing the Series
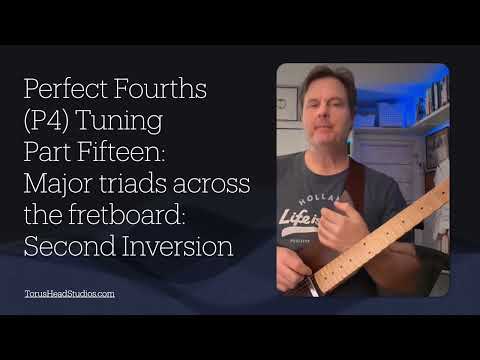
Guitar in Fourth Gear Perfect Fourths Tuning: Part 15 major triads second position
In this lesson on perfect fourths tuning, I cover major triads in second inversion across the entire fretboard using four repeatable shapes. Starting on the fifth instead of the root, perfect fourths tuning reveals symmetrical interval patterns and clear octave pathways that eliminate CAGED-style box confusion. This approach trains your ear to hear chord tones in real time and helps you navigate the neck confidently using interval awareness instead of memorized shapes.
TABLE OF CONTENTS:
00:00 – Introduction: Perfect Fourths Tuning, Part 15
00:09 – Series Goal: From CAGED Shapes to Interval Thinking
00:47 – What Is Perfect Fourths Tuning (E–A–D–G–C–F)
01:32 – Lesson Objective: Major Triads in Second Inversion
01:53 – Overview of the Four Second-Inversion Triad Shapes
02:15 – Shape Logic: Starting on the Fifth (5–1–3)
03:21 – Large Intervals: Perfect Fourth + Major Third
04:08 – Where This Fits in the Full Triad System
04:32 – Interval Structure of Major, Minor, Diminished, Augmented Triads
05:22 – Mapping the Entire Major Triad Across the Neck
05:50 – Hearing the Fifth as a Bass Reference
06:21 – Shape 1: 5–1–3 on Adjacent Strings
07:10 – Using Octaves to Extend Shapes Horizontally
07:51 – Shape 2: Fifth on One String, Root + Third on the Next
09:09 – Repeating Shapes Across Multiple String Sets
09:56 – Shape 3: Fifth + Root on One String, Third on the Next
10:40 – Large Stretch Shapes and Finger Management
12:00 – Shape 4: All Notes on a Single String
13:43 – Covering All Six Strings with One Shape
15:10 – Practice Strategy: Learning the Neck One Interval at a Time
15:52 – How Second Inversion Improves Improvisation Awareness
15:54 – Books, PDFs, and Continuing the Series
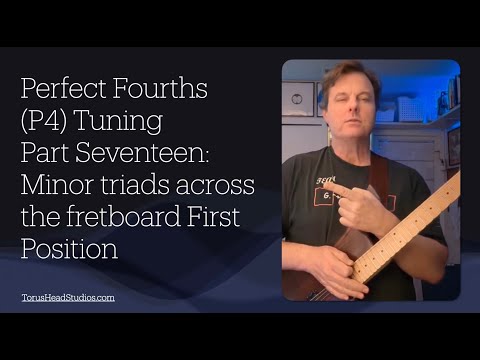
Guitar in Fourth Gear Perfect Fourths Tuning: Part 17 minor triads First Position
In this lesson on perfect fourths tuning, I cover minor triads across the fretboard starting from the first inversion using four repeatable shapes. By tuning in all fourths, complex CAGED patterns collapse into simple, symmetrical interval relationships that make it easier to see, hear, and connect chord tones anywhere on the neck. This approach builds real improvisational freedom by teaching you how minor triads function as movable, connected building blocks rather than memorized box shapes.
TABLE OF CONTENTS:
00:00 – Introduction: Perfect Fourths Tuning Part 17
00:11 – Series Philosophy: Escaping CAGED and Relearning Guitar
00:58 – What Is Perfect Fourths Tuning (E–A–D–G–C–F)
01:52 – Lesson Goal: Minor Triads in First Inversion
02:08 – Overview: Four First-Inversion Minor Triad Shapes
03:08 – Visual Layout of the Four Shapes
03:45 – How Inversions Fit Into the Overall System
05:27 – Mapping First-Inversion Minor Triads Across 24 Frets
06:05 – Shape 1: 3–5–1 on Adjacent Strings
07:34 – Using Octaves to Move Horizontally and Vertically
08:29 – Playing the Same Shape on Multiple String Sets
09:38 – Why Perfect Fourths Create One Universal Shape
09:42 – Shape 2: 3 on One String, 5–1 on the Next
10:25 – Stretching, Sliding, and Practical Fingering Options
11:29 – Extending Shape 2 Across the Entire Neck
12:22 – Shape 3: 3–5–1 With Alternate String Groupings
13:31 – Interval Logic: Major Thirds and Fourths Inside Minor Triads
14:54 – Shape 4: All Notes on a Single String
15:14 – Using Octaves to Replicate One-String Shapes
16:28 – Playing First-Inversion Minor Triads on All Six Strings
17:29 – How This Builds Improvisational Vocabulary
18:26 – Practice Strategy: Small Pieces Over Large Riffs
18:32 – Books, Resources, and Continuing the Series
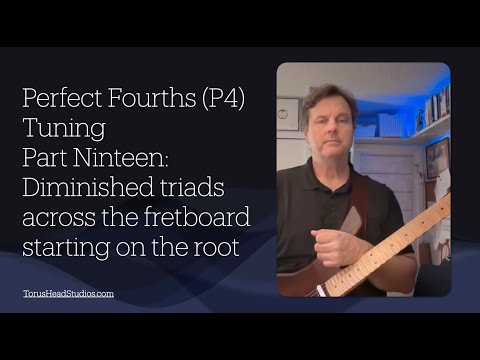
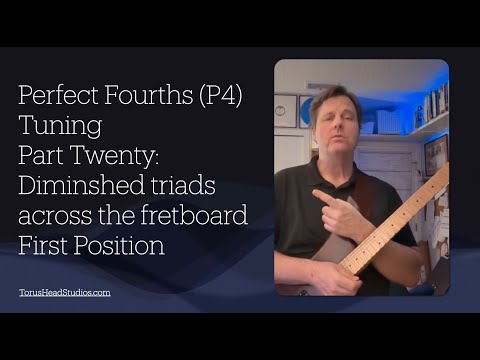
Guitar in Fourth Gear Perfect Fourths Tuning: Part 19 Diminished triads starting on the root
In this lesson on perfect fourths tuning, Chris Adams explores diminished triads across the entire fretboard, starting in root position. By retuning the guitar in all fourths, symmetrical interval relationships become visually and physically consistent, allowing diminished triads to be learned as movable shapes rather than memorized boxes. Because diminished harmony is built from stacked minor thirds, these shapes repeat predictably across the neck, making them ideal for developing fretboard awareness, improvisation, and interval-based thinking beyond CAGED. The lesson introduces four core diminished triad shapes, shows how they extend diagonally and horizontally, and explains how these triads relate to diminished seventh chords.
⸻
TABLE OF CONTENTS
00:00 – Introduction: Perfect Fourths Tuning Part 19 (Diminished Triads)
00:11 – Project Goals: Escaping CAGED and Thinking in Intervals
01:00 – What Is Perfect Fourths Tuning (E–A–D–G–C–F)
01:36 – String Gauge and Tuning Options (Tune Up vs Tune Down)
01:52 – Lesson Goal: Diminished Triads in Root Position
02:08 – What Makes Diminished Triads Unique (Symmetry & Minor Thirds)
02:44 – Diminished Triads vs Diminished Seventh Chords
03:44 – Why Learning Triad Shapes Unlocks All Inversions
04:05 – PDF Overview and Four Core Shape Categories
04:16 – Shape 1: 1–♭3–♭5 on Adjacent Strings
04:46 – Reference Starting Point on the Fretboard
05:24 – Shape 2: Root on One String, ♭3–♭5 on the Next
05:35 – Shape 3: Root–♭3 on One String, ♭5 on the Next
05:46 – Shape 4: All Three Notes on a Single String
06:05 – Extending Shape 1 Diagonally Across the Neck
07:25 – Octave Shifts and Running Out of Frets
08:11 – Interval Logic: Tritones and the Octave in Diminished Harmony
09:02 – Shape 1 Across Multiple Neck Positions
09:42 – Shape 2 Introduction and Interval Corrections
10:02 – Visualizing Tritones Moving Horizontally
10:26 – Playing Shape 2 Diagonally and Across Octaves
11:36 – Seeing Symmetry in Multiple Directions
12:36 – Hidden Notes That Complete the Diminished Seventh
12:56 – Shape 2 Across the Entire Fretboard
14:19 – Shape 3: Approaching the Same Tritones from Above
15:05 – Shape 3 Across Strings and Octaves
15:40 – Shape 3 Across the Full Neck
16:12 – Shape 4: Single-String Diminished Triads (Minor Third Stacks)
16:46 – Using Octaves to Move Shape 4 Across Strings
17:22 – Octave Offsets in Perfect Fourths Tuning
18:01 – Shape 4 on All Six Strings
19:20 – Adding the Missing Note to Form a Diminished Seventh
19:53 – Lesson Summary: Root Position, Four Shapes
20:00 – Next Lesson Preview: First-Inversion Diminished Triads
20:10 – Practice Advice: Slow, Thoughtful, No Metronome
20:34 – Books, PDFs, and Learning Resources
22:01 – Closing Thoughts and Thanks for Watching
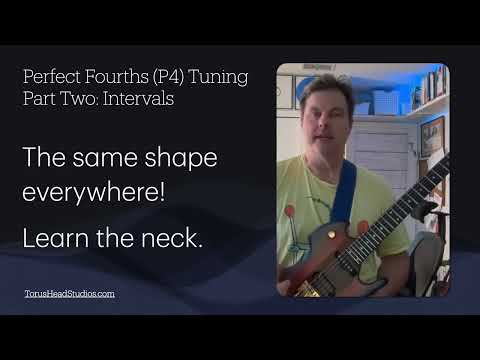
Guitar in Fourth Gear Perfect Fourths Tuning: Part 2 Intervals
In this lesson, I introduce learning intervals on a guitar tuned in perfect fourths and show how consistent shapes make interval recognition and fretboard navigation much easier.
We start with octaves, then move through fifths, fourths, thirds, and tenths, focusing on shape recognition, tone, and slow, mechanical practice rather than speed or flashy playing. The goal is to build reliable muscle memory so you always know what an interval will sound like and feel like anywhere on the neck.
This approach is designed for players rebuilding their fretboard understanding from first principles, transitioning from standard tuning, or looking for a calmer, more systematic way to practice. A PDF reference is linked below, and these interval shapes form the foundation for triads, chords, and more advanced harmony later on.
⸻
CHAPTERS
0:00 – Introduction: Learning Intervals in Perfect Fourths
0:11 – Perfect Fourths Tuning Setup and Reference PDF
0:46 – Why Intervals Matter for Fretboard Freedom
0:49 – Octave Shapes and Consistent Fingerings
1:36 – Using Octaves as a Daily Warm-Up
2:27 – Why Perfect Fourths Improves Muscle Memory
3:15 – Fifths, Power Chords, and Stacked Intervals
4:17 – Exploring Fourths and Harmonic Movement
5:15 – Minor and Major Thirds Explained
5:47 – Tenth Intervals and Open Sounds
6:11 – Freestyle Interval Practice for Ear Training
7:12 – Intervals as the Foundation of Triads and Chords
7:28 – Interval Inversions and Musical Context
7:55 – Books, Next Topics, and Wrap-Up
Guitar in Fourth Gear Perfect Fourths Tuning: Part 20 diminished triads First Inversion
In this lesson on perfect fourths tuning, Chris Adams explores diminished triads across the entire fretboard in first position, continuing his systematic approach to relearning guitar through intervallic thinking rather than CAGED box shapes. By tuning the guitar in perfect fourths (E–A–D–G–C–F), symmetrical structures like diminished chords become easier to visualize, move, and internalize. Chris demonstrates four repeatable diminished triad shapes—across adjacent strings, split string pairs, and single-string layouts—and shows how their inherent symmetry allows them to repeat seamlessly across strings and octaves. The focus is not speed or exercises, but slow, thoughtful pattern recognition that builds true fretboard fluency and long-term improvisational freedom.
⸻
TABLE OF CONTENTS
00:01 – Introduction: Perfect Fourths Tuning Part 20
00:05 – Lesson Focus: Diminished Triads in First Position
00:10 – Series Philosophy: Intervallic Thinking vs. CAGED
00:28 – Relearning Guitar from First Principles
01:19 – Perfect Fourths Tuning Explained (E–A–D–G–C–F)
01:56 – Why Fourths Tuning Simplifies Shapes Across the Neck
02:07 – Learning One Shape Everywhere on the Fretboard
02:27 – Lesson Goal: Four Diminished Triad Shapes
02:44 – Why Diminished Triads Are Symmetrical
03:00 – Building a Diminished Triad: Minor Third + Minor Third
03:17 – How Diminished Chords Divide the Octave
03:36 – Diminished Triads and the V7 Chord (Brief Context)
04:05 – Why Learning Shapes First Comes Before Theory
04:10 – Symmetry and Repeating the Same Pattern Everywhere
04:52 – Inversions Through Pattern Repetition
05:07 – Overview: The Four Diminished Triad Shapes
05:30 – Shape 1: 3–5–1 on Adjacent Strings
05:59 – Larger Intervals Compared to Major/Minor Triads
06:04 – Locating the Root and Starting on the Third
06:28 – Shape 1 Demonstration Across the Neck
07:01 – Moving Diagonally Up and Down the Fretboard
08:02 – Color-Coded Diagram: Roots, Thirds, and Tritones
08:30 – Applying Shape 1 with A as the Root
08:55 – Ergonomic Benefits of the First Shape
09:11 – Hearing the Tritone Inside the Diminished Triad
09:21 – Why Diminished Inversions Sound Similar
09:52 – Practicing Diminished Shapes Effectively
10:14 – Shape 1: Full Walkthrough Across String Sets
11:24 – Enharmonic Notes and Tritone Naming
11:46 – Shape 1 Across All Four String Groups
12:30 – Shape 2: Third on One String, Fifth–Root on the Next
13:02 – Large Stretches and Optional Tapping
13:14 – Shape 2 Moving Vertically Up the Neck
13:46 – Shape 2 Moving Horizontally Across Strings
14:11 – Combining All Positions of Shape 2
14:43 – Shape 3: 3–5 on One String, Root on Another
15:00 – Interval Structure: Minor Third + Tritone
15:26 – Symmetry of Tritones Across the Neck
16:02 – No String-Tuning “Hump” in Perfect Fourths
16:15 – Shape 3 Across Strings and Positions
17:35 – Connecting Octaves Within the Shape
17:48 – Shape 4: All Notes on a Single String
18:06 – Managing Extreme Stretches with Slides
18:29 – Shape 4 Moving Up the Neck
19:11 – Octaves in Perfect Fourths vs. Standard Tuning
19:39 – Shape 4 Across All Six Strings
20:50 – Complete Review of the One-String Shape
22:02 – Summary: All Four Diminished Triad Shapes
22:28 – Practice Philosophy: Thinking Over Speed
22:41 – Learning Small Patterns and Extending Them
22:57 – Books and Resources: Guitar in Fourth Gear
23:21 – Triad Studies Volumes and Practice Materials
24:03 – Chris’s Website, Coding Work, and Closing Thoughts

Guitar in Fourth Gear Perfect Fourths Tuning: Part 3 Major Scale Using Three Patterns
In this video, I go into detail about three patterns in the major scale:
two whole steps
a whole step and a half step
a half step and a whole step.
Once you understand this, you can see the major scale as a collection of smaller fingering patterns that repeat.
0:03 – Major Scales in Perfect Fourths: Three Essential Shapes
0:15 – First Principles: Intervals of the Major Scale
0:31 – Perfect Fourths Tuning Setup and Why It Matters
1:02 – Major Scale Intervals: Whole Steps and Half Steps
1:45 – Mapping Major Scale Intervals on the Fretboard
2:09 – The Three Core Three-Note-Per-String Patterns
2:42 – Why Major Scale Patterns Repeat at Fourths
3:25 – Seeing the Same Intervals Across the Neck
4:00 – Why Perfect Fourths Makes Patterns Line Up
4:57 – Reducing the Major Scale to Three Shapes
5:43 – Practicing the Three Shapes Cleanly and Efficiently
5:49 – Preview: Using One Shape to Cover the Entire Neck
6:12 – Practice Advice for Adult and Returning Guitarists
6:39 – Book, Resources, and What’s Coming Next

Guitar in Fourth Gear Perfect Fourths Tuning: Part 5 Major Scale using Whole Step Half Step Pattern
You can play the entire major scale on the same fingering pattern if you use one note to slide and connect them. This is how to play the major scale using the whole step half step pattern. In other videos, I show how to play the scale using the whole step whole step pattern, and also the half step whole step pattern.
0:01 – Perfect Fourths Part 5: Whole–Half Pattern Overview
0:11 – Review: Whole–Whole vs Whole–Half Patterns
0:19 – Perfect Fourths Tuning Refresher
0:46 – Major Scale Context and Why This Isn’t About Shredding
1:17 – The Three Shapes on a Perfect Fourths Guitar
1:46 – Understanding the Whole–Half Step Difference
2:22 – Focusing on the Key String Pair for This Pattern
3:02 – Treating This as a Major Scale (Ignoring Modes for Now)
3:44 – How the Patterns Break Across the Neck
4:49 – Why This Video Focuses Only on the Whole–Half Pattern
5:05 – Reading the Diagram and Matching It to the Fretboard
5:49 – Why Finger Patterns Matter More Than Note Names
6:11 – Mapping the Full Scale Across Multiple Octaves
7:36 – Using the Pattern to Build a Diagonal Scale Path
8:18 – Sliding to Extend the Scale Up the Neck
9:09 – Practicing the Pattern Without Thinking About Modes
10:24 – Slow, Meditative Practice for Finger Fluency
11:12 – Why This Exercise Improves Navigation, Not Speed
12:03 – Two and a Half Octaves Explained
12:52 – How This Translates to Real Improvisation
13:00 – Why Perfect Fourths Makes This Easier Than Standard Tuning
13:40 – Books, Resources, and Wrapping Up the Series

Guitar in Fourth Gear Perfect Fourths Tuning: Part 6 Major Scale Half Whole Pattern
In this lesson, I continue the Perfect Fourths Tuning series by showing how to play a two-and-a-half octave major scale using the half–whole step pattern.
We review where this pattern fits among the three core major scale shapes, then focus on fingerings, string-pair thinking, and controlled slides rather than speed or shredding. The goal is to make the scale feel connected across the neck so you can navigate it fluently while improvising.
This approach is especially useful if you’re rebuilding your fretboard understanding from first principles, coming back to guitar later in life, or transitioning from standard tuning to perfect fourths.
A PDF reference is linked below, and this pattern connects directly to the previous videos in the series on whole–whole and whole–half patterns.
0:01 – Perfect Fourths Part 6: Half–Whole Pattern Overview
0:14 – Recap: Major Scale Patterns Covered So Far
0:26 – Perfect Fourths Tuning and Why It Evens Out Shapes
1:07 – Major Scale on Piano vs Guitar
1:35 – Where This Pattern Fits Among the Three Major Scale Shapes
1:46 – Starting the Half–Whole Pattern from the Middle String Pair
2:12 – Ignoring Modes and Focusing on Fingering
2:29 – Slow Practice and Muscle Memory
2:41 – Using Multiple Patterns to Cover the Full Major Scale
2:57 – Reading the Diagram and Matching It to the Fretboard
3:16 – Starting from the Pickup Note and Sliding Through the Scale
3:59 – Repeating the Pattern Across String Pairs
4:39 – Building the Scale with Slides Between Positions
5:03 – Daily Relaxed Practice Approach
5:36 – Making Slides Intentional vs Connected
6:13 – Thinking in String Pairs Instead of Positions
6:47 – When the Pattern Starts to Feel Automatic
7:02 – Recognizing Patterns in Other Players’ Solos
7:24 – Rebuilding Mastery from Intervals Up
7:59 – What Comes Next in the Series
8:42 – Books, Resources, and Wrap-Up

Guitar in Fourth Gear Perfect Fourths Tuning: Switch From CAGED to Perfect Fourths (P4) Tuning Pt. 1
Guitar in Fourth Gear Part 1: Why switch to Perfect Fourths Tuning?
Unlike many guitar modifications, tuning to perfect fourths is free, takes just a few seconds and is entirely reversible!
Fourths tuning is a small change and easy to try. Going back and forth between standard and perfect fourths is very easy. I keep guitars in different tunings, but you can also re-tune in seconds.
The Power of Symmetry
Perfect fourths tuning makes the entire fretboard completely symmetrical, unlocking new playing possibilities you might not have anticipated at first. You should be able to pick up the general idea of this tuning and play it smoothly in a few minutes. After spending some time with it, you will see that the shapes make much more sense and the fretboard is much easier to learn.
Simplifying Muscle Memory
With a symmetrical fretboard, you can develop muscle memory quickly and easily because you only need to learn one pattern for each arpeggio, scale, or chord. You can concentrate on improving your technique and speed without worrying about learning different shapes for the same musical idea. In standard tuning, you must learn any chord or scale in 3 different shapes to play horizontally across the fretboard. The irregular major third interval between the G and B strings creates an inconsistent pattern. In perfect fourths tuning, you only need to learn one shape, and you can play it anywhere on the fretboard.
Devote more time and energy to refining your technique and building speed by eliminating the need to learn different shapes for the same concept.
For example, if you want to practice a four-note, three-string arpeggio across the fretboard in standard tuning, you'll need three patterns, which means about 20 minutes per pattern in an hour. The same arpeggio in P4 tuning has only one pattern, so you can practice that for the entire hour.
TABLE OF CONTENTS
0:04 – Introduction: Guitar in Fourth Gear
0:10 – Why Perfect Fourths Tuning Simplifies Guitar
0:17 – My Transition from Standard Tuning
0:31 – Relearning Guitar from First Principles
0:44 – The B-String Problem in Standard Tuning
0:51 – Thinking in Intervals Instead of Patterns
1:04 – Overview of the Guitar in Fourth Gear Books
1:09 – Standard Tuning vs Perfect Fourths Tuning
1:24 – How the Perfect Fourth Relationship Works
1:47 – Why Standard Tuning Preserves Cowboy Chords
1:54 – Retuning Options: Top Strings Up vs Bottom Strings Down
2:08 – Tone, String Tension, and Playability Benefits
2:33 – String Gauge Considerations
2:57 – Breaking Out of Blues Boxes and Familiar Positions
3:18 – Symmetry and Reduced Memorization
3:30 – Practicing One Shape Instead of Three
3:48 – Modern Sounds and Fourth-Based Harmony
4:02 – Using the Same Patterns Across Guitar and Bass
4:22 – Downsides: Cowboy Chords and When to Use Standard Tuning
4:51 – Learning Advanced Players Faster with Fewer Shapes
5:14 – Notable Players Using Perfect Fourths Tuning
5:43 – The CAGED System in Standard Tuning
6:17 – One Chord Shape Across the Neck in Fourths
6:44 – Comparing CAGED Shapes to Fourths Shapes
7:29 – Retuning the Guitar to Perfect Fourths
8:12 – Playing Major Chords with a Single Shape
8:46 – What You Lose (and Keep) Without Open Chord Duplications
9:09 – Moving the Same Shape to Change Chords
9:39 – Why the A Shape No Longer Breaks Symmetry
9:55 – Partial Bar Chords Reimagined
10:24 – One Shape for Root–Fifth–Octave–Third
11:02 – Triads and Octaves with Consistent Fingerings
11:52 – Two Shapes Instead of Five: The Core Advantage
12:04 – Interval Shapes Stay Identical Everywhere
12:49 – Escaping Familiar Fretboard “Neighborhoods”
13:13 – Intervals, Inversions, and Vocabulary
13:53 – Same Shape, Same Sound, Anywhere on the Neck
14:33 – Practicing High on the Neck with Confidence
14:49 – Scale Fragments That Repeat Everywhere
15:27 – Faster Progress Through Shape Reuse
16:01 – Why This Approach Accelerates Learning
16:13 – Book Overview and Closing Thoughts

Strat Free-Way 5-Way/10-Position Electric Guitar Pickup Switch with Stew Mac Golden Age Pickups
Strat pickups: 10 position free way switch
This video demonstrates the tones for a Free-Way 5-Way/10-Position Electric Guitar Pickup Switch with Stew Mac Golden Age Pickups in a Humbucker/Single/Single configuration.
I demonstrate the Freeway switch on a Strat-style guitar using a humbucker–single–single configuration. I walk through the full 10 pickup positions, explain how the switch expands tonal options beyond a standard 5-way selector, and show how it performs across different fretboard positions. I also cover my signal chain, wiring choices, and why the Freeway switch can be a smart upgrade before replacing pickups—especially if you want more tonal flexibility without committing to new hardware.
TL/DR:
The good:
I would buy one for MOST guitars before upgrading pickups
Great to have options
The Switch is well designed: up for beef, down for twang
Not so good:
Too many choices: not all good
--
TABLE OF CONTENTS
0:05 – Introduction and Overview
What the Freeway switch is and why it’s worth considering before upgrading pickups.
0:19 – Why the Freeway Switch
Design quality, expanded tonal options, and the tradeoff of having more choices.
1:03 – Guitar Configuration and Signal Chain
Squier Strat setup, wiring choices, pickups, strings, tuning, and hardware mods.
1:57 – Interface, Plugins, and Amp Modeling
Audio interface, Neural DSP Mesa Boogie plugin, and compression choices.
2:53 – Physical Tour of the Guitar
Control layout, kill switch, knobs, and Freeway switch ergonomics.
4:02 – How the Freeway Switch Works
Explanation of stacked positions and single-coil vs humbucker sounds.
4:37 – Walking Through Pickup Positions (1–10)
Systematic demo of each switch position and its tonal character.
5:36 – Practical Pickup Choices in Real Playing
Which positions are most usable for clean, twang, and heavier sounds.
6:12 – Standard Strat Positions (1–5)
Demonstration of traditional Strat tones using the Freeway switch.
7:24 – Expanded Positions (6–10)
Series and humbucking-style tones beyond a normal 5-way switch.
8:17 – Tone Differences Across the Neck
How pickup positions react differently depending on fretboard location.
8:44 – Full Playthrough Demonstration
Extended musical examples cycling through all pickup combinations.
14:50 – Real-World Observations
Which sounds hold up best, where others break down, and why players switch pickups mid-phrase.
15:18 – Recommendation and Cost Comparison
Why the Freeway switch is a cost-effective upgrade compared to new pickups.
15:21 – What’s Next
Upcoming video installing Lace Sensor pickups and repeating the shootout.
Parts of this guitar:
Stew Mac "Golden Age" pickups (no longer sold?)
https://amzn.to/3UGRNnk
Free-Way 5-Way/10-Position Electric Guitar Pickup Switch:
https://amzn.to/3P51LLV
Plastic covers for single coil pickups
https://amzn.to/3UCFisU
Wilkinson/Gotoh VS-100N Tremolo
https://amzn.to/3HZMdVw
Squire Bullet Strat:
https://amzn.to/42Gl83u
Grover 406C6 Rotomatic Mini 6 in Line Self Locking Machine Heads
https://amzn.to/49aStWp
Tesi DITO Black 24mm Kill Switch
https://amzn.to/48eAJIG
Mogami platinum guitar cable
https://amzn.to/3OIfjMO
Solid State Logic SSL 12 USB Audio Interface
https://amzn.to/3OGQssY
Apple (for mac computer, iPhone, logic, keynote, etc.)
https://amzn.to/49z4HrW

Video 3: How the retail ecosystem works from the perspective of a small-time inventor
*distorted audio is addressed after a few minutes*
This is video 3 of 10:
How the retail ecosystem works from the perspective of a small time inventor
I manufactured and sold a product over the last 14 years. I have been meaning to make this video for a long time because it fills a gap in the market and shows what happens to the inventions that don't fail, or become household words.
10 Main Ideas to my video series on Laptop Lifts/making a product
I have been wanting to do this for 10 years. It is about time to start.
1. Be realistic about your expectations: In the process of bringing an invention to market will learn a lot that will help you in all parts of your life
2. how to learn things for free from manufacturers, lawyers, and retailers
3. How the retail ecosystem works from the perspective of a small time inventor
4. Shipping can be up to 50% of your costs
5. The 5x rule to pricing your product: designing a product for a price point
6. Advertising and Conversions: harder than it seems
7. Learn by looking: get ideas for your environment. Simplify your design
8. Customer relationships: feedback, guarantees and returns
9. How to sell on Amazon, Ebay and others. International sales.
10. Prototyping and Manufacturing
https://laptoplifts.com/

What does a Bass Whammy Bar Sound Like?
Three improvs in 3 styles/tones:
Clean Funk
Envelope Follower
Distorted with a pick
This is a Music Man Sterling bass with a freshly installed Kahler tremolo.